



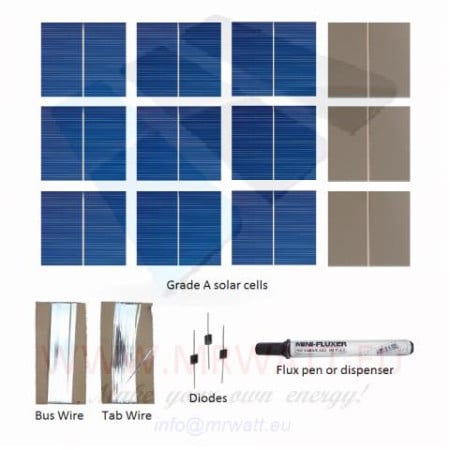


DIY Solar Panel Kit 36W – 36 Poly Cells 3x3
36 grade-A polycrystalline 3"x3" (78x78 mm) solar cells with tab and bus wire, flux and a Schottky diode to build your own 36 W, 12V nominal solar panel in the shape you need.
A kit designed by MR WATT, with spare cells included: ideal for campervans, boats, gardens and off-grid school projects.
The MR WATT 36W DIY solar panel kit contains 36 grade-A polycrystalline 3"x3" (78x78 mm) solar cells plus the accessories to connect them. With a soldering iron and an afternoon of work you can build a 12V nominal photovoltaic panel in the exact shape and size you need. We designed this kit ourselves for people who want to understand solar power hands-on, and for anyone who needs a custom-sized panel that simply isn't sold off the shelf.
Why the 3"x3" cell is the right size to start with
The 78x78 mm cell is a quarter of the classic 6" (156 mm) cell. That brings two practical advantages: it is easier to handle and solder than a full cell, and 36 pieces give you exactly the 36-cell string needed to charge a 12V battery through a charge controller. Small cells also allow shapes that large cells cannot: a long, narrow panel for a boat's gunwale, a square one for a garden light post, a compact module for a school project.
K36P-3x3-A technical specifications
| Number of cells | 36, plus a few spare cells |
| Technology | Polycrystalline silicon |
| Quality | Grade A |
| Cell size | 3"x3" inches – 78x78 mm |
| Total kit power | 36 W (about 1 W per cell) |
| Typical configuration | 36 cells in series – 12V nominal panel |
| Voltage at maximum power (36 in series) | approx. 18 V (indicative value) |
| Open-circuit voltage (36 in series) | approx. 21-22 V (indicative value) |
| Current at maximum power | approx. 2 A (indicative value) |
| Included accessories | Tab wire and bus wire, flux, Schottky diode |
| Shipping weight | 0.4 kg |
Building the panel: the three choices that matter
- Layout: 4 rows of 9 cells give a narrow panel with a cell area of about 33x73 cm; 6 rows of 6 give a square of about 48x48 cm. Final dimensions depend on cell spacing (2-3 mm) and on the frame.
- Soldering: use a 60-80 W soldering iron with a flat screwdriver tip, apply flux on the busbars and lay the cells on glass or another smooth, heat-insulating surface. The ribbon is soldered to the front (negative) of one cell and taken to the back (positive) of the next.
- Encapsulation: bare cells are vulnerable to moisture and knocks. For a long-lasting panel use EVA sheets, clear silicone resin (for example QSIL 216) or a sandwich between two glass panes. Encapsulation materials are not included in the kit.
In the Learning Zone on mrwatt.eu and on our YouTube channel MRWattDIY you will find step-by-step guides and videos on soldering and assembling solar cells.
What you can do with it every day
In Southern Europe a 36 W panel produces on average about 0.13 kWh per day over the year, up to 0.2 kWh on summer days and less than half of that in winter. Paired with a charge controller and a 12V battery, in practice it can:
- recharge a 12V 7 Ah battery (about 84 Wh) in one or two sunny days;
- power a 5 W 12V LED strip for 3-4 hours every summer evening;
- keep the service battery of a boat or campervan topped up while it is laid up;
- run small low-power electronics: garden cameras, sensors, Arduino boards.
The kit is designed for off-grid systems: a grid-connected installation requires certified modules, not self-built panels.
Frequently asked questions
What exactly is in the kit?
36 grade-A polycrystalline 78x78 mm solar cells, a few spare cells to make up for breakages during soldering or shipping, tab wire and bus wire, flux and a Schottky diode. The soldering iron, encapsulation materials, frame, junction box and charge controller are not included.
What panel do I get by connecting the 36 cells in series?
A 36 W, 12V nominal panel with about 18 V at maximum power, 21-22 V open-circuit and about 2 A of current. These are the typical values of panels used to charge 12V batteries through a PWM or MPPT controller.
Can I build a 6V or 24V panel instead?
Yes. 18 cells in series give a 6V nominal panel (about 9 V at maximum power): with the 36 cells in the kit you can build two 18 W panels, or wire them as two parallel strings for about 4 A. A 24V nominal panel needs 72 cells in series, so two kits.
Do I need a charge controller?
Yes, always, in any system with a battery. Connecting the panel straight to the battery overcharges it, causing electrolysis, electrolyte loss and in the worst cases a risk of explosion. A small PWM controller is enough for a 36 W panel; an MPPT gains a little more on cold, bright days.
I'm a beginner: can I build it myself?
Yes, the 3"x3" cell is one of the easiest formats to learn on. The cells are thin and fragile: work on a smooth surface, don't press down with the iron tip, and use 60-80 W to solder quickly without overheating the cell. The spare cells included are there precisely to cover your first breakages.
- Power
- 35W
- Solar cells
- 36x Poli 3"x3" (78x78mm) 0.55V 1.8A
- Diodes
- 1x schottky Diode 5A 100V
- Flux
- 1x Dispenser 10ml Stannol flux x32-10i
- Tab wire
- 6m (20') 0.15x2mm