
HOW TO SOLDER SOLAR CELLS TO BUILD A RESPECTABLE LOW-COST PHOTOVOLTAIC PANEL
The use of solar energy has not been opened up because the oil industry does not own the sun
Ralph Nader
Some information that I hope will be useful for building a photovoltaic panel:
Photovoltaics is a technology that allows direct conversion of sunlight into electrical energy, exploiting the so-called photovoltaic effect.
This effect is based on the property of certain appropriately treated semiconductor materials (including silicon, a very common element in nature) to directly generate electrical energy when hit by solar radiation, without the use of any fuel.
The most basic device capable of performing this conversion is the photovoltaic cell, which can produce about 1/1.5 Watts of power when exposed to radiation of 1000 W/m2 (standard irradiation conditions).
A solar cell, also known as a photovoltaic cell, is a device that converts light energy into electrical energy.
Sometimes the term solar cell is used to refer to devices that capture solar energy, while the term photovoltaic cell is used when the light source is unspecified.
The solar cell, used to produce energy, has an efficiency ranging from 13 to 22%.
Usually, the cells, made with semiconductor material like silicon, which is widely used in this field, are 0.25 mm thick and have a square shape of 125 x 125 mm (5"x5") or 156 x 156 mm (6"x6").
OPERATION
When the cell is exposed to light, if impurities are introduced into the crystalline structure of the silicon used for the construction of solar cells, an electric field is created, which is then transformed into energy.
Photovoltaic conversion is a physical phenomenon that allows the direct transformation of light energy into electrical energy in elementary structures, the photovoltaic cells.
These devices are made of semiconductor materials, which conduct electrical current and whose resistivity decreases with increasing temperature and the presence of impurities.
The photovoltaic effect consists of generating a difference in electrical potential, thanks to the integration of a flow of radiant energy with matter.
In our photovoltaic KITS, which you can find in the dedicated category on the site, you will find two types of soldering wire, the TAB wire and the BUS wire, which you can easily recognize because the first is thinner and will be used to solder the cells together to form strings, while the BUS Wire is used to join the strings of cells together.
Another very important component of the KIT is the flux or rosin flux, which is used to allow proper soldering; for soldering, we recommend using a 60W/80W flat-tip soldering iron, screwdriver type (it is very economical, costing about €10.00), and we recommend placing the cells on a smooth glass surface or other thermally insulating materials.
In the KITS, we do not provide the glass and framing because they are easily obtainable from glaziers or DIY stores, to avoid increasing shipping costs that would then impact your final savings.
The solar cell, as you can see in the photo below, has the negative pole on the front, the blue-colored part to be clear, while the positive one is on the back; the bands you see in the middle are called connection bands or Bus bars and are used to connect the cells together.
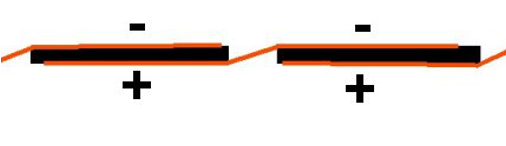
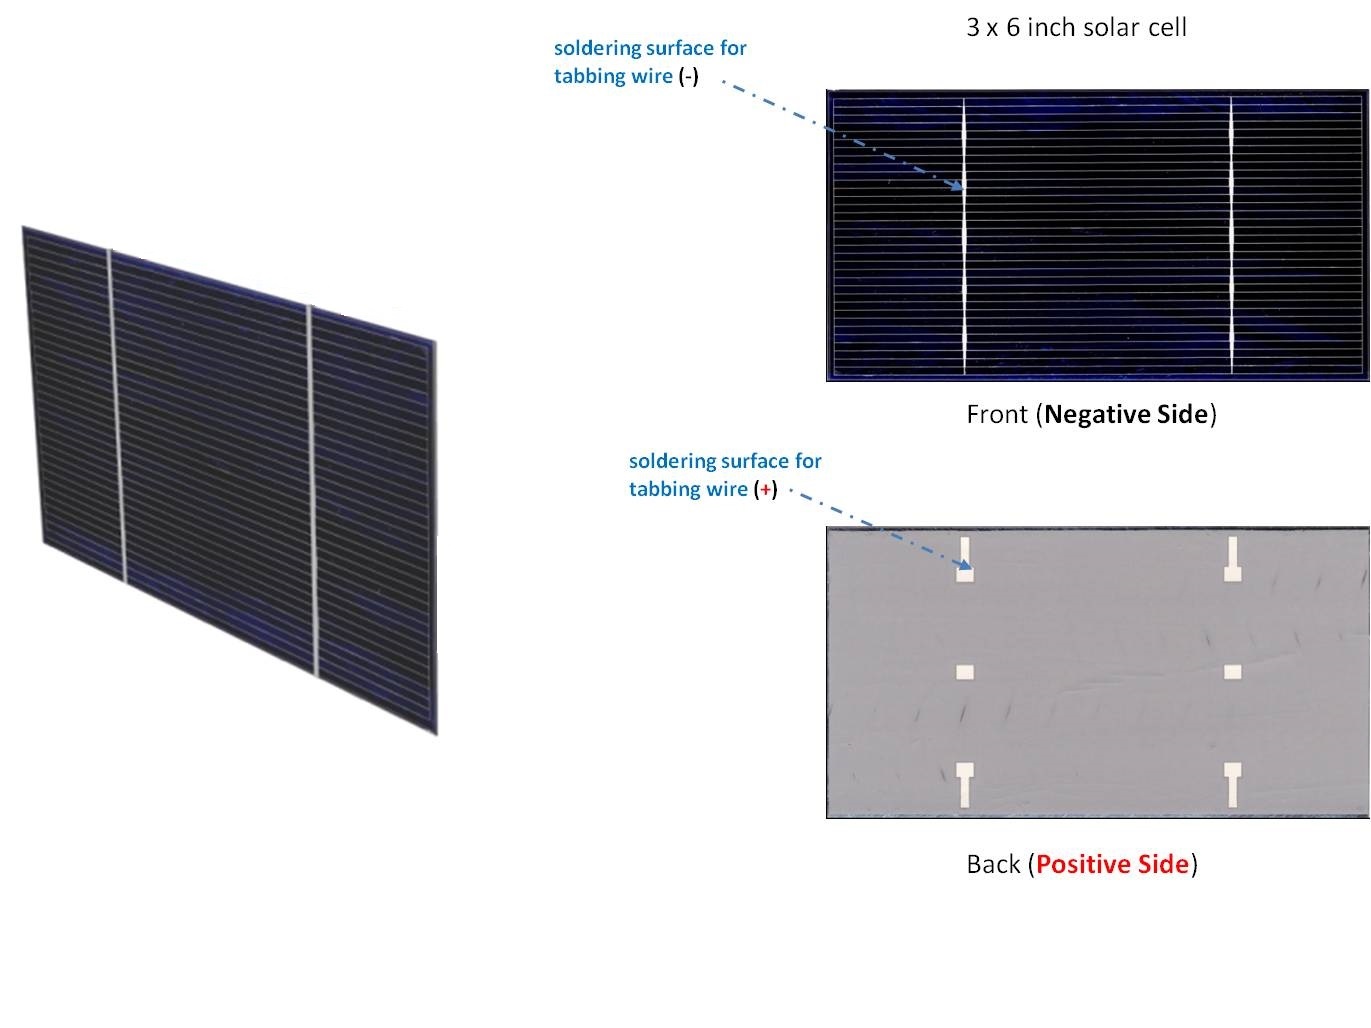
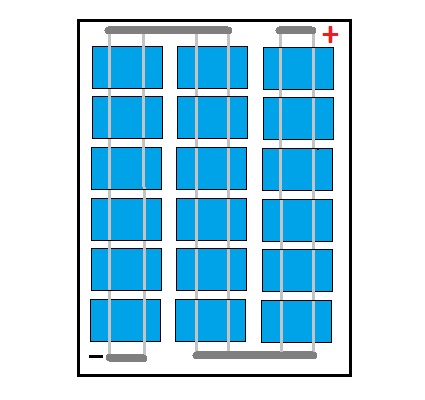
Since each solar cell has a voltage of 0.55V (0.6V Peak), to build a panel that charges a 12V battery, you will need at least 30 cells that you will have to connect in series with each other (the positive pole of one cell goes with the negative of the other) to obtain an adequate voltage. To build a solar panel, the first thing you will need to take care of is precisely the soldering of the solar cells, in a "serpentine" type scheme that I report below, in which we have 3 strings of 6 solar cells connected in series, so considering 0.55V per cell, you will have a photovoltaic panel with a voltage of about 10V at a current of 3.8A if we take as an example the 3"X6" inch (76X156 mm) 3BB (3 connection bars) polycrystalline solar cell from:
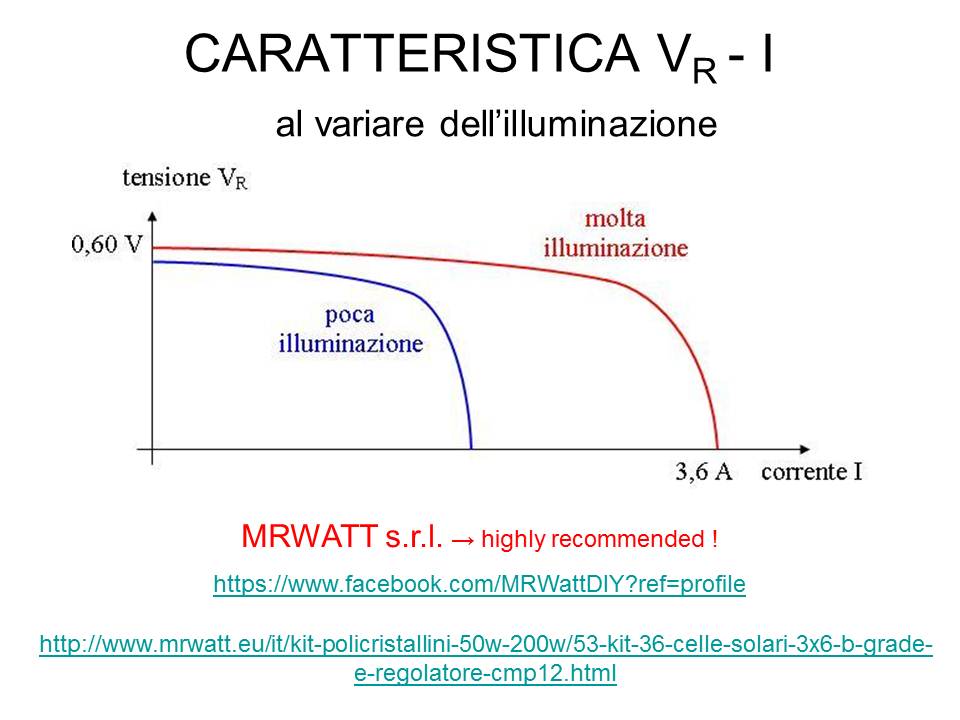
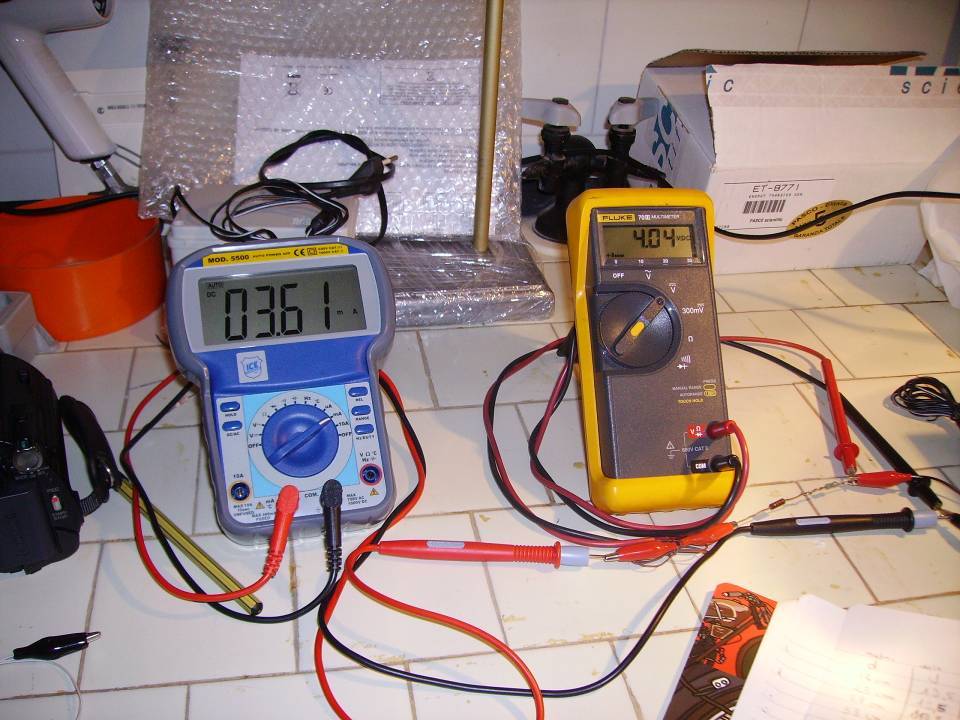
Below we provide some example data on the voltage-current characteristic curve measurements of a solar cell sold in our store; we thank Prof. Alessio Piana and his students for sharing this magnificent work with us.
CIRCUIT DIAGRAMS

PHOTO 1
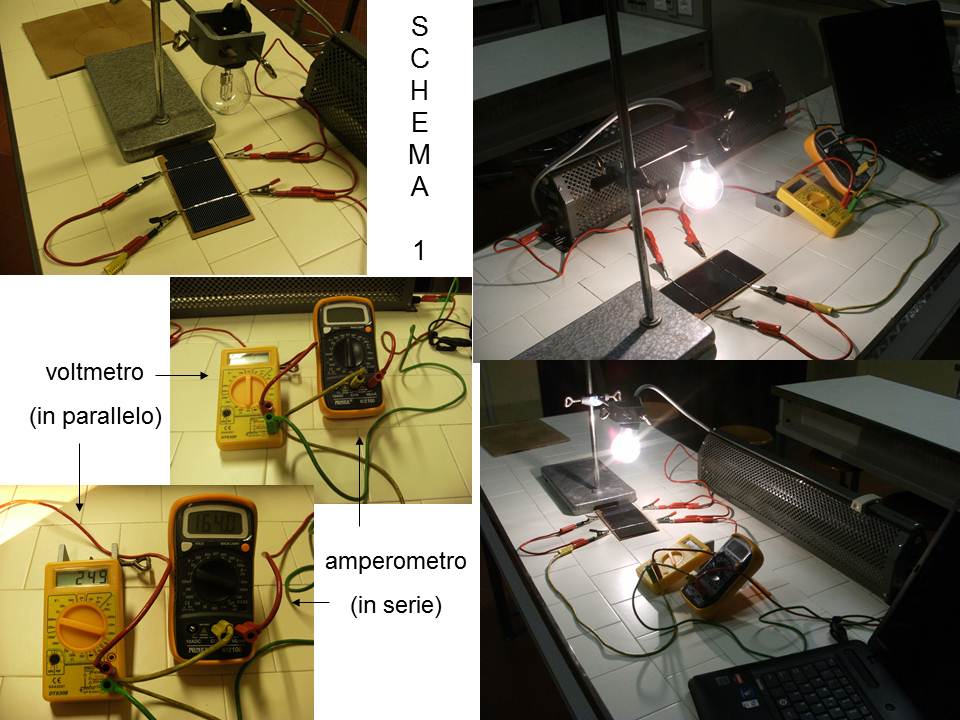
PHOTO 2
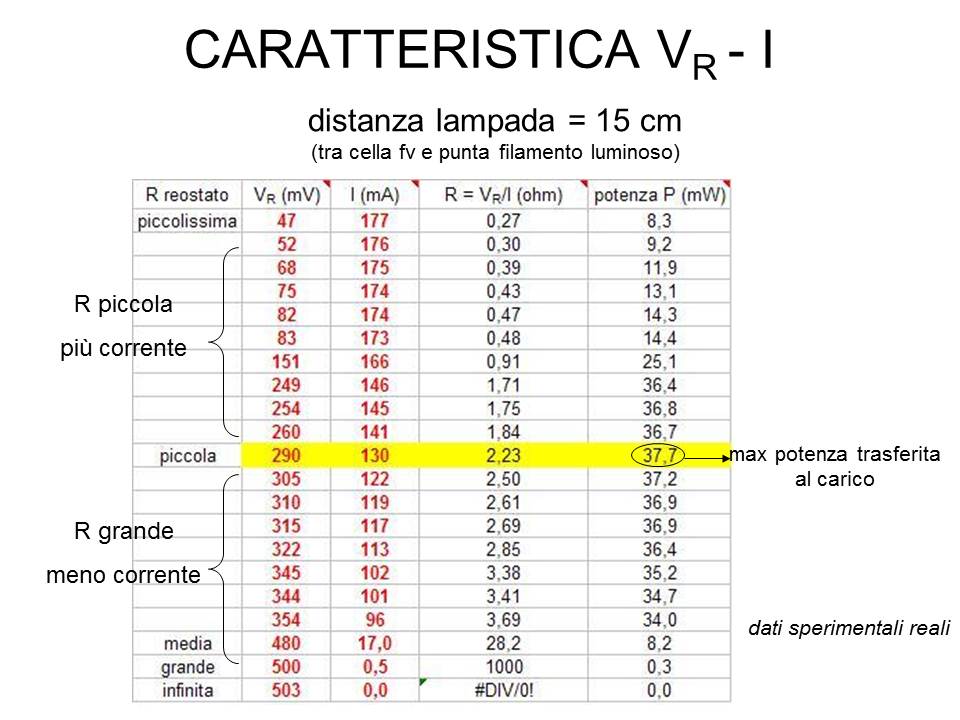
PHOTO 3

PHOTO 4
Below, another laboratory test on an already assembled solar panel composed of the KIT of 36 solar cells 1"x3" inches available in our online store
PHOTO 1
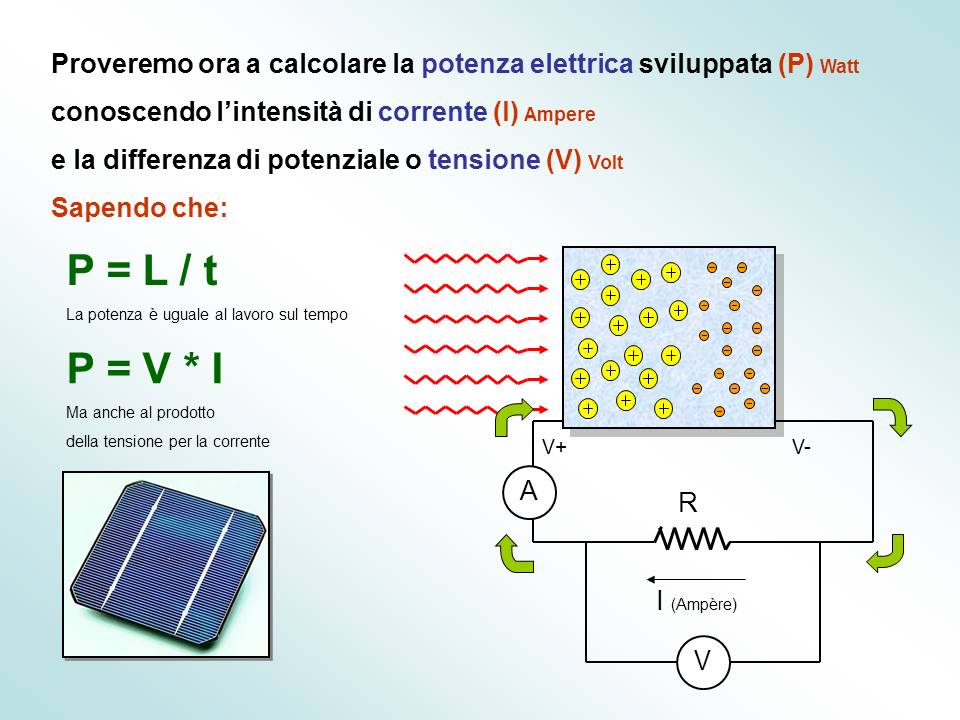
PHOTO 2
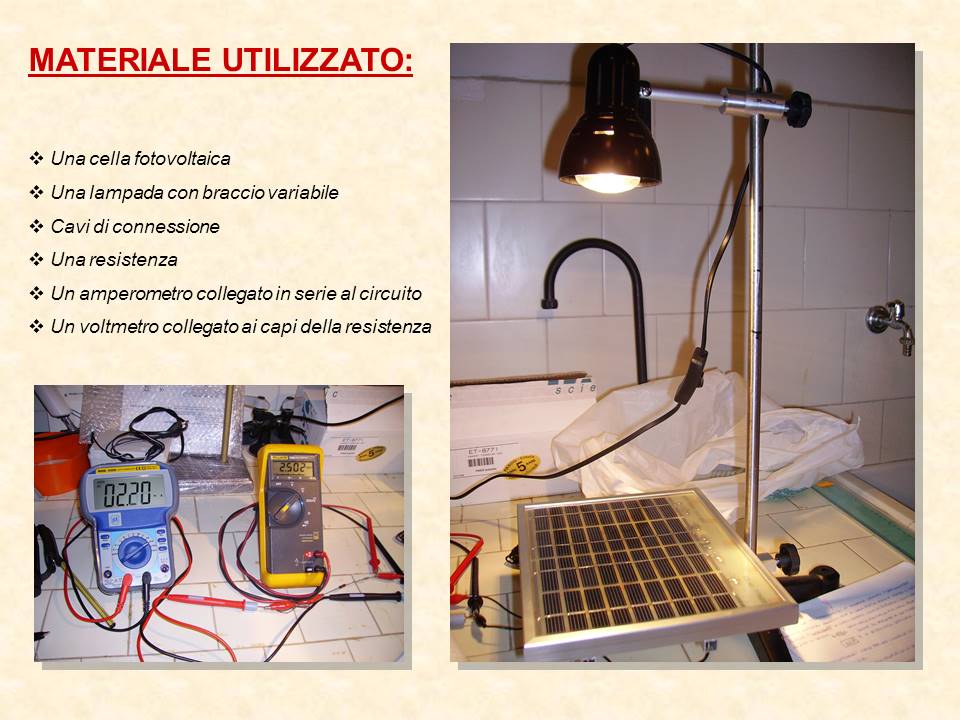
PHOTO 3
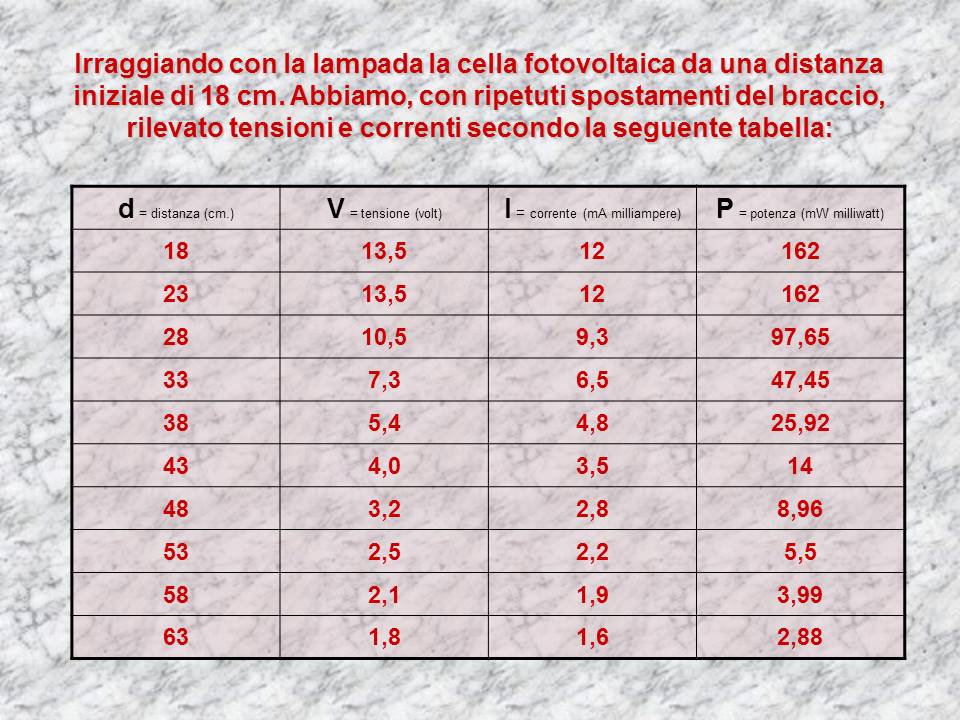
PHOTO 4
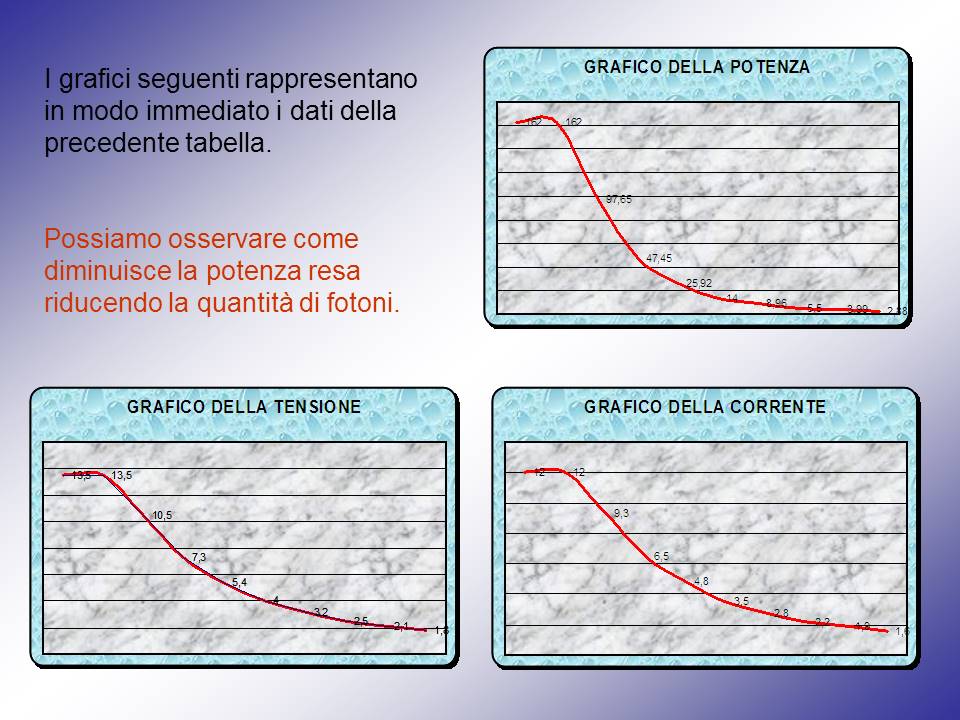
PHOTO 5
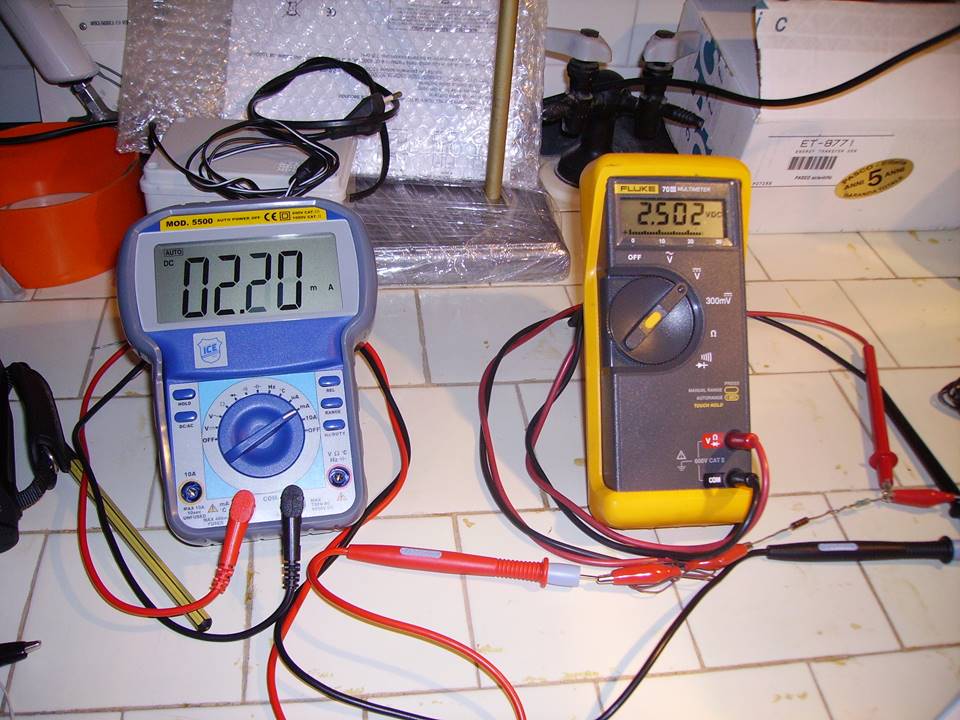
PHOTO 6
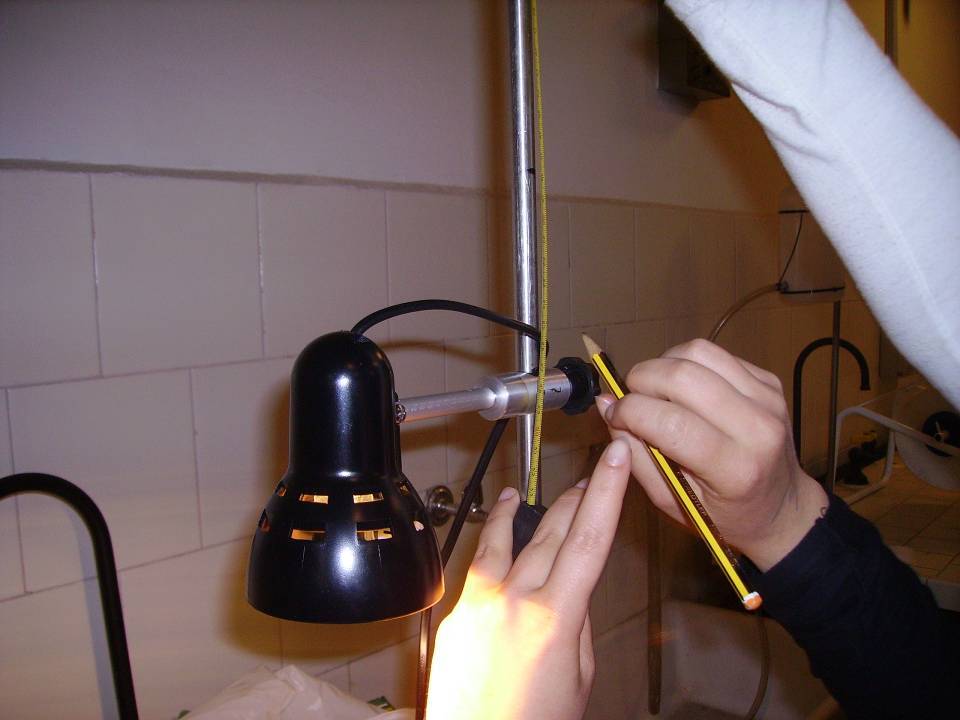
PHOTO 7
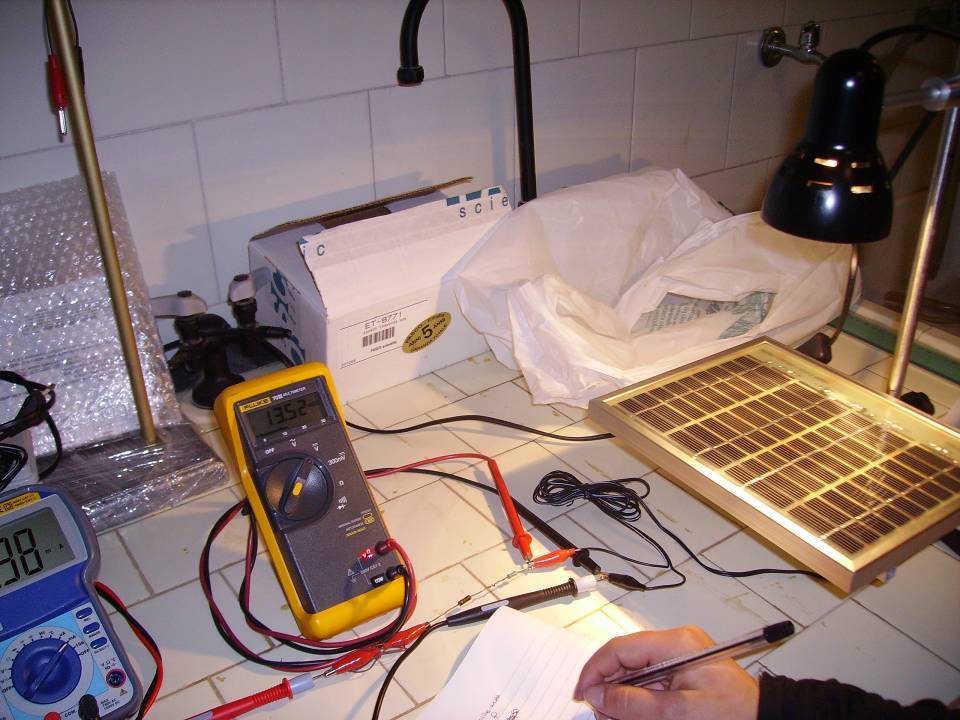
PHOTO 8
It will be very important to mount the solar cells effectively to ensure a long panel life, low risk of corrosion and breakage. There are several options to achieve a good result, such as encapsulating the cells within a double-glazed window or using special silicone resins like QSIL 216 or Ethylene Vinyl Acetate (EVA) sheets available in our store.
In the category "Your Projects" on the site, you can also find other more economical methods that some of our customers have used to achieve a good result, particularly you can refer to the article written by Alessandro Paglialonga.